Author Topic: 1984 Ascot mild project  (Read 70683 times)

scott s

  • Newbie
  • *
  • Posts: 49
1984 Ascot mild project
« on: June 14, 2017, 03:10:10 pm »
 Posted about a potential purchase:
http://ascot500.com/index.php?topic=798.0

 And made the deal today. Got a killer deal on this and a CB360. The Ascot is a keeper, not sure what I'll do with the 360 yet.
 Bike is in nice shape with a little over 11K miles. Minor scratches and needs some elbow grease and compounding, but the bodywork is straight and not cracked or dented. The tank needs a minor cleaning, but only above the line of the old gas. No rust through or thin spots; very solid and straight.
 I know it needs fork seals, all fluids and normal tune up stuff. The front caliper is completely missing, so I'll have to replace that and go through the brakes. I'll clean the carbs, just because (unless ya'll think I should try firing it up as-is and see what happens). Overall, a SOLID bike that doesn't need much at all!
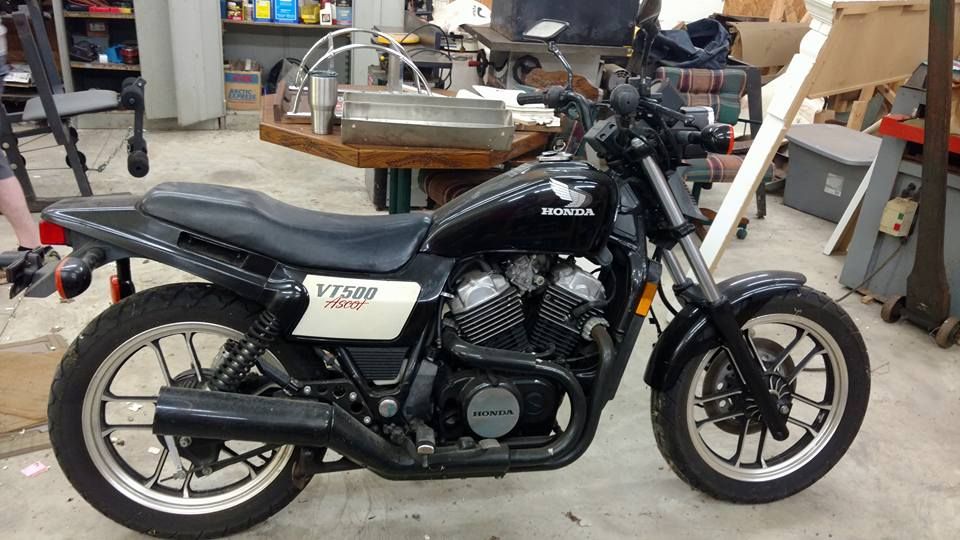
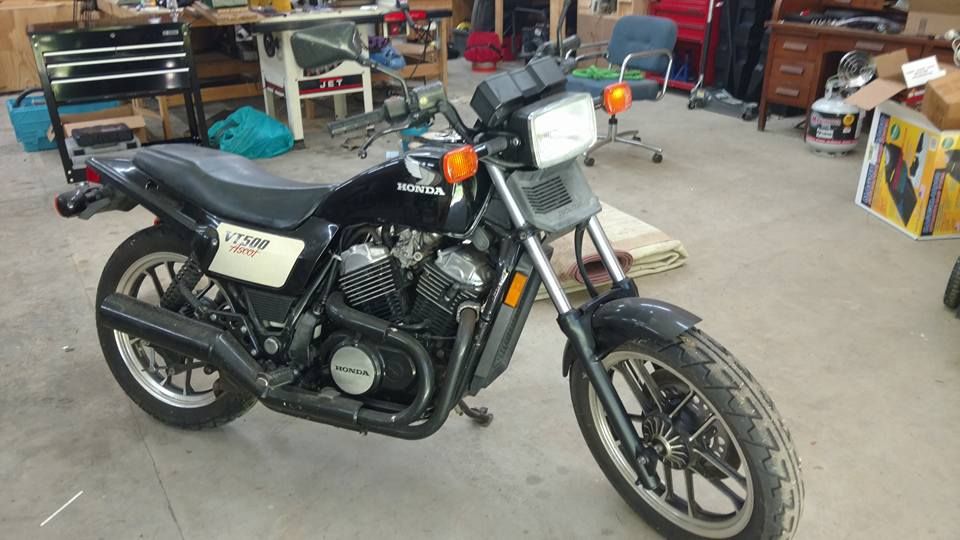
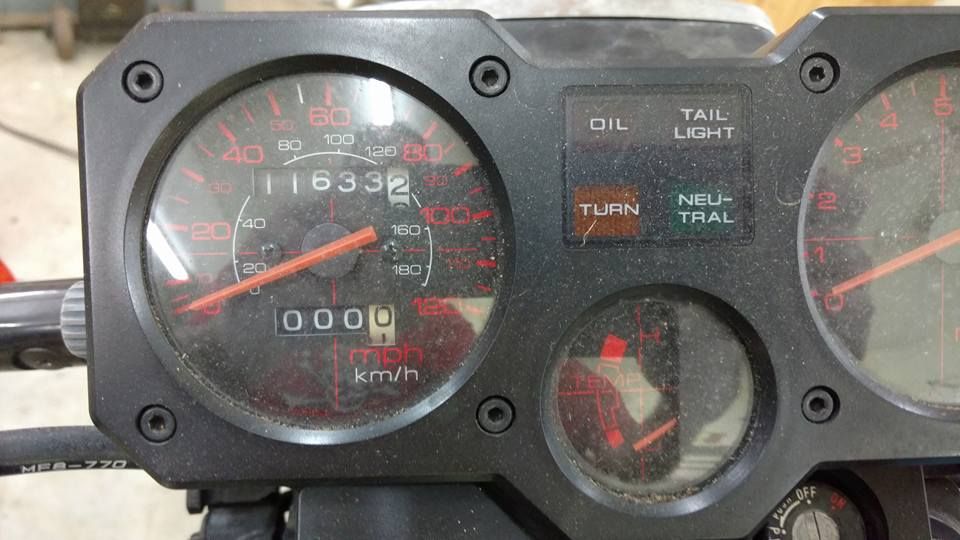


 In the van....
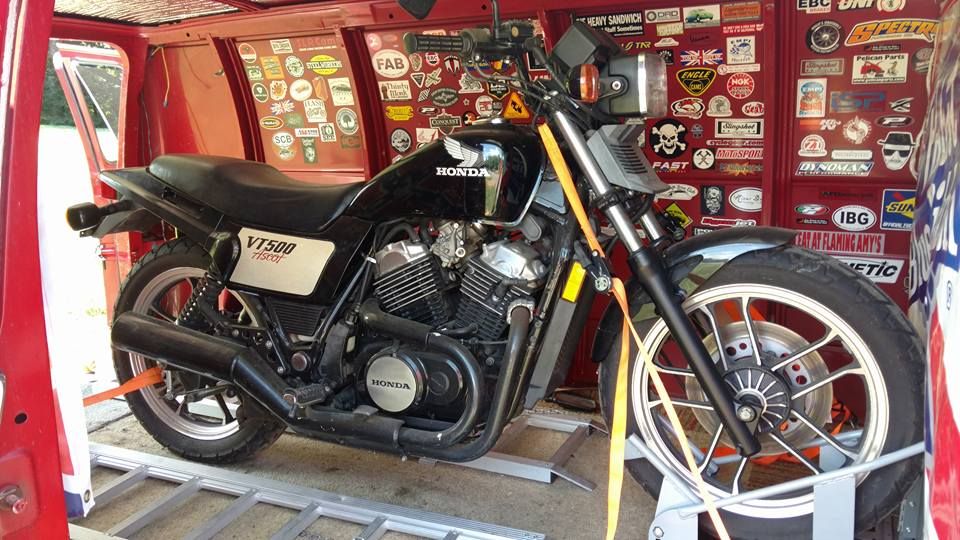


 ...and after a quick bath.
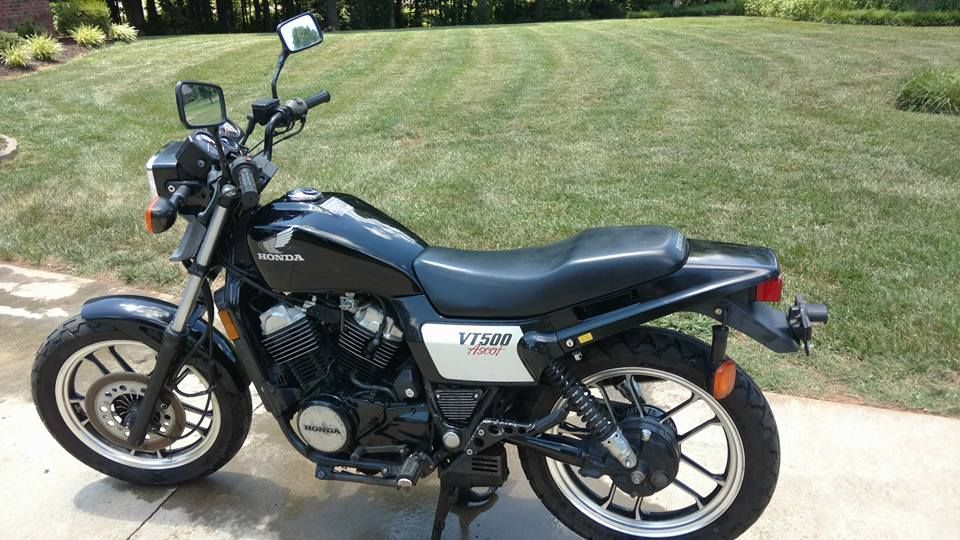


 I plan on doing some minor "bolt on" cosmetic stuff, such as smaller turn signals, maybe a rear fender eliminator, probably do SOMETHING with the headlight and gauges (number plate or a round headlight?) and maybe a Trailtech Vapor gauge unit, depending on which way I go with the lighting.

murdo

  • Full Member
  • ***
  • Posts: 138
Re: 1984 Ascot mild project
« Reply #1 on: June 15, 2017, 04:43:42 am »
While your cleaning carbs, changing oils, etc, and replacing the caliper it is always a good idea to replace the 30+ year old brake hoses as they deterioate from the inside and go soft.

scott s

  • Newbie
  • *
  • Posts: 49
Re: 1984 Ascot mild project
« Reply #2 on: June 15, 2017, 06:49:54 am »
 Oh, definitely. Always on my "to do" list.

murdo

  • Full Member
  • ***
  • Posts: 138
Re: 1984 Ascot mild project
« Reply #3 on: June 15, 2017, 05:44:16 pm »
I have used a few of these Chinese made ones with no problems (they make other lengths). My son works at a hydarulic shop and tested one to 3,000psi for me, so I they will never get that much pressure from your hand/foot. I wrap them in black heatshrink and they look like originals but give much better feel at the lever/pedal.
http://www.ebay.com.au/itm/172586472580?_trksid=p2060353.m1438.l2649&ssPageName=STRK%3AMEBIDX%3AIT

scott s

  • Newbie
  • *
  • Posts: 49
Re: 1984 Ascot mild project
« Reply #4 on: June 15, 2017, 05:58:12 pm »
I cross referenced the caliper part # and found one from the same year Shadow that had everything I needed; hanger, bolts, caliper, etc. Only about $35 shipped. I happened to already have a brand new master cylinder and there's a hydraulics shop near my house that makes brake hoses. I can get a braided stainless hose, pressure tested, for pennies on the dollar compared to what Galfer, etc., charge.

 Pulled the tank and drained out the old gas. What size is the petcock bung? Looking for something to cap it off to soak and clean the tank.

scott s

  • Newbie
  • *
  • Posts: 49
Re: 1984 Ascot mild project
« Reply #5 on: June 17, 2017, 07:56:28 pm »
 Got the old gas out and soaked the tank with EvapoRust.

 Before:


 After (the line is where I initially started with only one gallon and was moving the tank around to soak. Ended up topping it off with another gallon):


murdo

  • Full Member
  • ***
  • Posts: 138
Re: 1984 Ascot mild project
« Reply #6 on: June 18, 2017, 04:37:28 am »
Looks good.

scott s

  • Newbie
  • *
  • Posts: 49
Re: 1984 Ascot mild project
« Reply #7 on: June 19, 2017, 06:38:46 pm »
 I pulled the air filter and 75% of the foam was GONE. But there was a nice stash of kibbles in the air box. It never ceases to amaze me where the varmints can get.


 Cleaned the housing with Simple Green and carb cleaner. Vacuumed and wiped out the air box. Used some leftover UNI foam and made a new filter.


scott s

  • Newbie
  • *
  • Posts: 49
Re: 1984 Ascot mild project
« Reply #8 on: June 19, 2017, 06:40:58 pm »
Pulled the carbs and I'm glad I did. I can still smell the old gas that came out, and while the throttle turned, the slides were stuck. Diaphragms are good. I dropped them and the CB360 carbs off with my carb guy.

scott s

  • Newbie
  • *
  • Posts: 49
Re: 1984 Ascot mild project
« Reply #9 on: June 23, 2017, 06:48:47 pm »
 Got the oil and filter changed in the VT. It uses the same filter my VF500 uses and I just happened to have a couple on hand.
 
 I gathered up the stuff for the brakes but was stymied by some stuck pistons in the caliper I picked up. I just have a little 3 gallon compressor and it wouldn't pop them out . I'll drop it off at my buddy's shop and have him pop them out.
 I had a new 16mm master cylinder on hand. Bought it for the VF500 and ended up not needing it. I picked up some EBC pads and had a stainless hose made at a local hydraulics shop. Only $24!


scott s

  • Newbie
  • *
  • Posts: 49
Re: 1984 Ascot mild project
« Reply #10 on: June 23, 2017, 06:51:27 pm »
Found these bars at the local Mom 'n' Pop motorcycle shop. NOS Honda CRF230F bars for only $35. I had to finagle them a bit because of the non-detachable cross bar, but they work. It's amazing what a simple bar change can do!
 The controls aren't fully tightened down yet. I'll do that once I have the seat on.


Bucko

  • Full Member
  • ***
  • Posts: 106
Re: 1984 Ascot mild project
« Reply #11 on: June 27, 2017, 05:29:13 pm »
......and had a stainless hose made at a local hydraulics shop. Only $24!

Scott:  How long is your new brake hose?  Is it the same lenght as the original?  How long is the original? 

The hose on my Ascot needs to be replaced but it's not original and too long so I can't used that as a guide for replacement length.
« Last Edit: June 28, 2017, 02:05:17 pm by Bucko »

scott s

  • Newbie
  • *
  • Posts: 49
Re: 1984 Ascot mild project
« Reply #12 on: June 27, 2017, 09:23:01 pm »
......and had a stainless hose made at a local hydraulics shop. Only $24!

Scott:  How long is you new brake hose?  Is it the same lenght as the original?  How long is the original? 

The hose on my Ascot needs to be replaced but it's not original and too long so I can't used that as a guide for replacement length.

 Overall length is 46", and that includes the banjos, tip to tip. I got held up on the brake job as the replacement  caliper was stuck solid. Heat, penetrating fluid, even 150 PSI of air and it wouldn't budge.
 I got a full refund and have another on the way. I also picked up a drilled rotor.

scott s

  • Newbie
  • *
  • Posts: 49
Re: 1984 Ascot mild project
« Reply #13 on: June 27, 2017, 09:30:56 pm »
 Oh, and I no longer have the stock hose, but that's what I used to have the new one made, so I guess it's still stock length.

Bucko

  • Full Member
  • ***
  • Posts: 106
Re: 1984 Ascot mild project
« Reply #14 on: June 28, 2017, 02:16:15 pm »
Thanks for the measurement Scott.

Stuck calipers on this vintage of bike are pretty common.  Using air pressure to pop them out can be dangerous.  Better option is to use the hydraulic pressure of the brake system to pump them out.  Or if that's not an option, thread a grease nipple into the bleed valve, plug the hose inlet with a bolt, and pump the pistons out using a low pressure grease gun.   Either way you have to use use something (like a thin block of wood) wedged in the caliper gap to prevent one piston from popping out before both pistons are moving. I've read that boiling the caliper in water for a few minutes can help free things up but I haven't tried that myself.

9 of 9

  • Newbie
  • *
  • Posts: 6
Re: 1984 Ascot mild project
« Reply #15 on: June 28, 2017, 08:17:44 pm »
I also am a fan of Evaporust.

scott s

  • Newbie
  • *
  • Posts: 49
Re: 1984 Ascot mild project
« Reply #16 on: June 29, 2017, 06:15:33 am »
 I've used the grease gun method on CB model single piston calipers. I'm not sure even that would work on this one, and even if it did it would probably require a ~$90 rebuild kit. Cheaper to just get a replacement.

scott s

  • Newbie
  • *
  • Posts: 49
Re: 1984 Ascot mild project
« Reply #17 on: July 01, 2017, 01:34:26 pm »
 Over the last few days I've gotten the radiator flushed and coolant changed. Changed the gear oil in the final drive. Rebuilt the forks and installed a new (old) drilled rotor, braided S.S. hose, EBC pads and new master cylinder.


 Also ordered some new tires; Kenda K-761's.


Bucko

  • Full Member
  • ***
  • Posts: 106
Re: 1984 Ascot mild project
« Reply #18 on: July 01, 2017, 11:54:03 pm »
Is that rotor a stock one that you had drilled or is it from another model?

scott s

  • Newbie
  • *
  • Posts: 49
Re: 1984 Ascot mild project
« Reply #19 on: July 02, 2017, 07:11:07 am »
Is that rotor a stock one that you had drilled or is it from another model?

 It's from a '95 Shadow. I cross referenced the part # and the drilled rotor(s) were used on several other Honda models.

Bucko

  • Full Member
  • ***
  • Posts: 106
Re: 1984 Ascot mild project
« Reply #20 on: July 04, 2017, 01:10:36 am »
But a drilled rotor, even if it's the same size, would have a different part number, no ?

In any case, it looks groovy!

scott s

  • Newbie
  • *
  • Posts: 49
Re: 1984 Ascot mild project
« Reply #21 on: July 04, 2017, 09:39:48 am »
But a drilled rotor, even if it's the same size, would have a different part number, no ?

In any case, it looks groovy!

 I used the models mentioned it this thread: http://ascot500.com/index.php?topic=669.msg3702#msg3702

 I went to the parts fiche and looked up the part #'s for those models, then cross referenced them again. That opened up a few more models that used the same drilled rotors.

scott s

  • Newbie
  • *
  • Posts: 49
Re: 1984 Ascot mild project
« Reply #22 on: July 06, 2017, 01:04:17 pm »
After struggling with the rear axle nut for over an hour.... heat, impact gun, PB Blaster, you name it....I was finally able to free it by having the GF hold the axle with a screwdriver on the opposite side while I used a 2 ft. piece of PVC pipe on a 2 ft. breaker bar. It was just stuck with corrosion and age. I cleaned it up and lubed everything properly on reassembly.
 New tires mounted and balanced and brakes properly adjusted.


 Nice and meaty all the way around and still clears the fender and swing arm with room to spare.


Bucko

  • Full Member
  • ***
  • Posts: 106
Re: 1984 Ascot mild project
« Reply #23 on: July 10, 2017, 04:29:35 am »
I like how those tires look.  What are the sizing details?

scott s

  • Newbie
  • *
  • Posts: 49
Re: 1984 Ascot mild project
« Reply #24 on: July 10, 2017, 02:34:57 pm »
 110/90-18 and 120/90-18.